asyncdefmake_nws_request(url: str) -> dict[str, Any] | None: """Make a request to the NWS API with proper error handling.""" headers = {"User-Agent": USER_AGENT, "Accept": "application/geo+json"} asyncwith httpx.AsyncClient() as client: try: response = await client.get(url, headers=headers, timeout=30.0) response.raise_for_status() return response.json() except Exception: returnNone
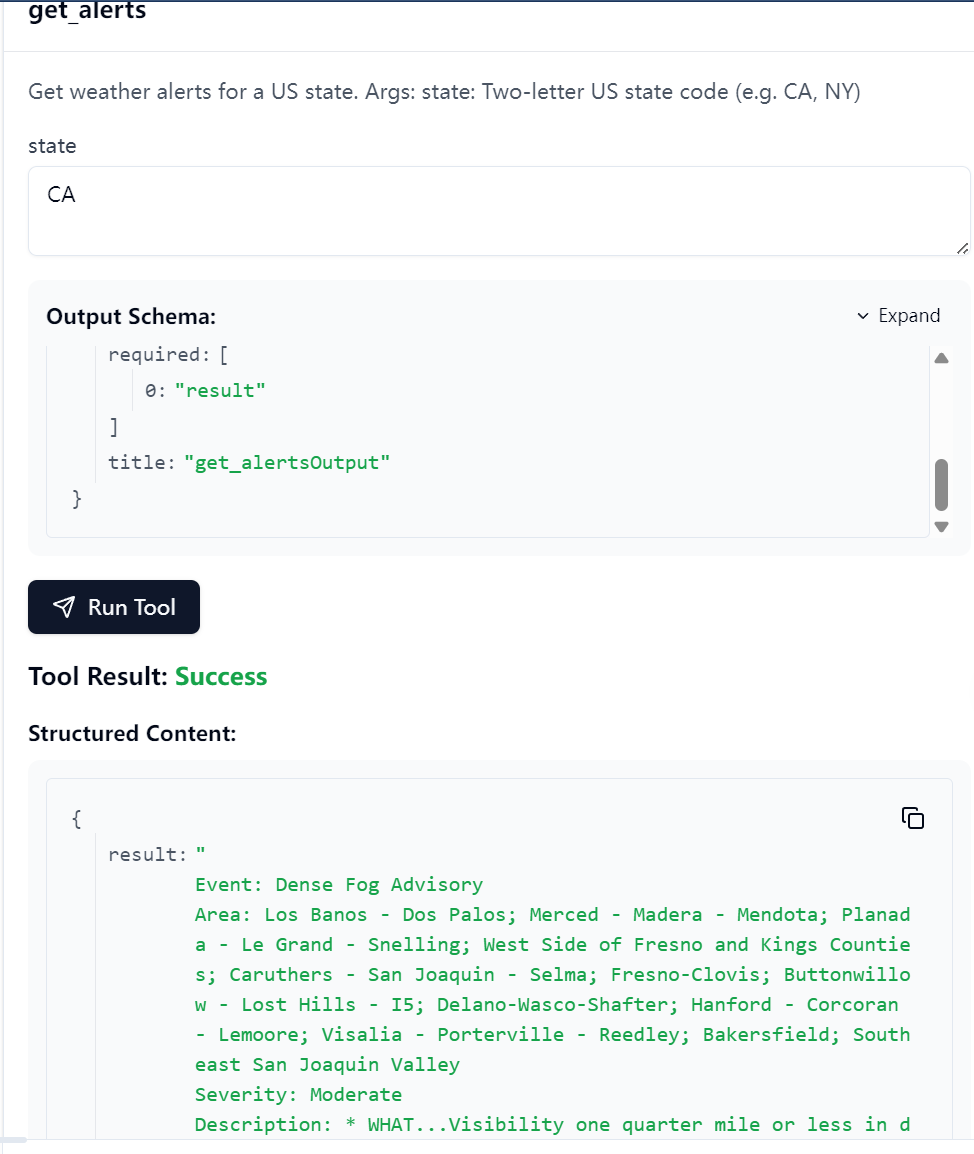
defformat_alert(feature: dict) -> str: """Format an alert feature into a readable string.""" props = feature["properties"] returnf""" Event: {props.get("event", "Unknown")} Area: {props.get("areaDesc", "Unknown")} Severity: {props.get("severity", "Unknown")} Description: {props.get("description", "No description available")} Instructions: {props.get("instruction", "No specific instructions provided")} """
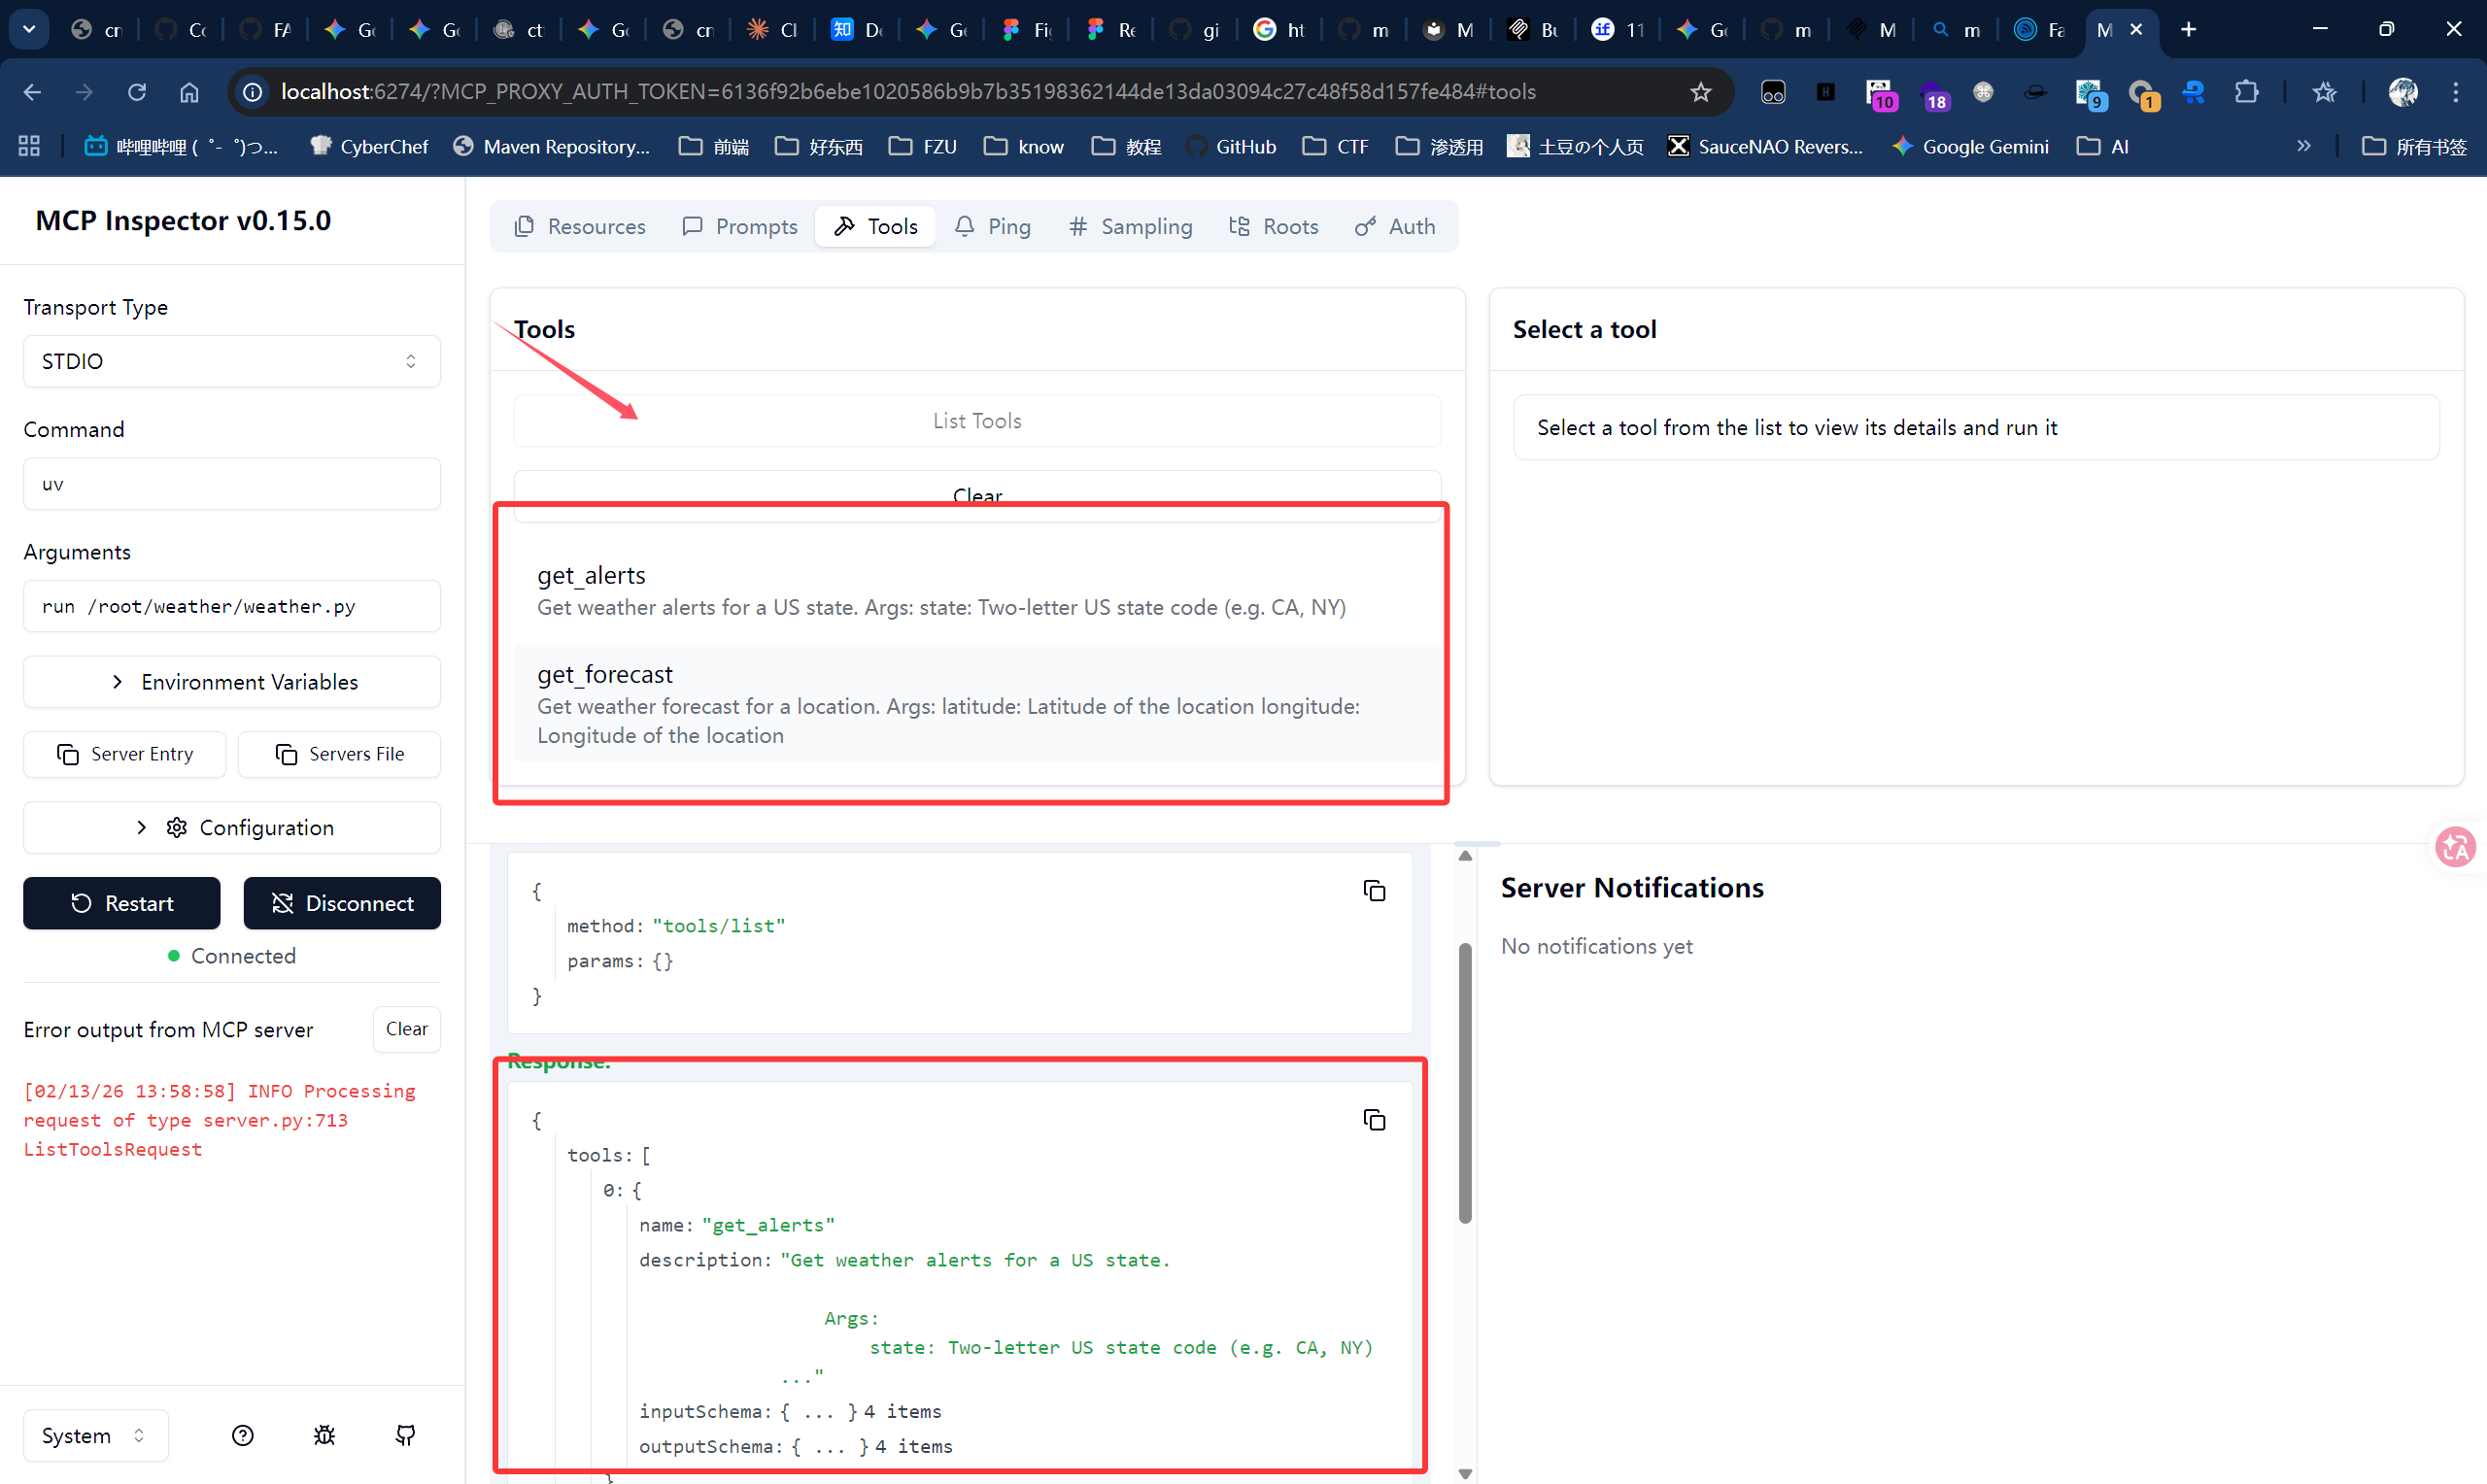
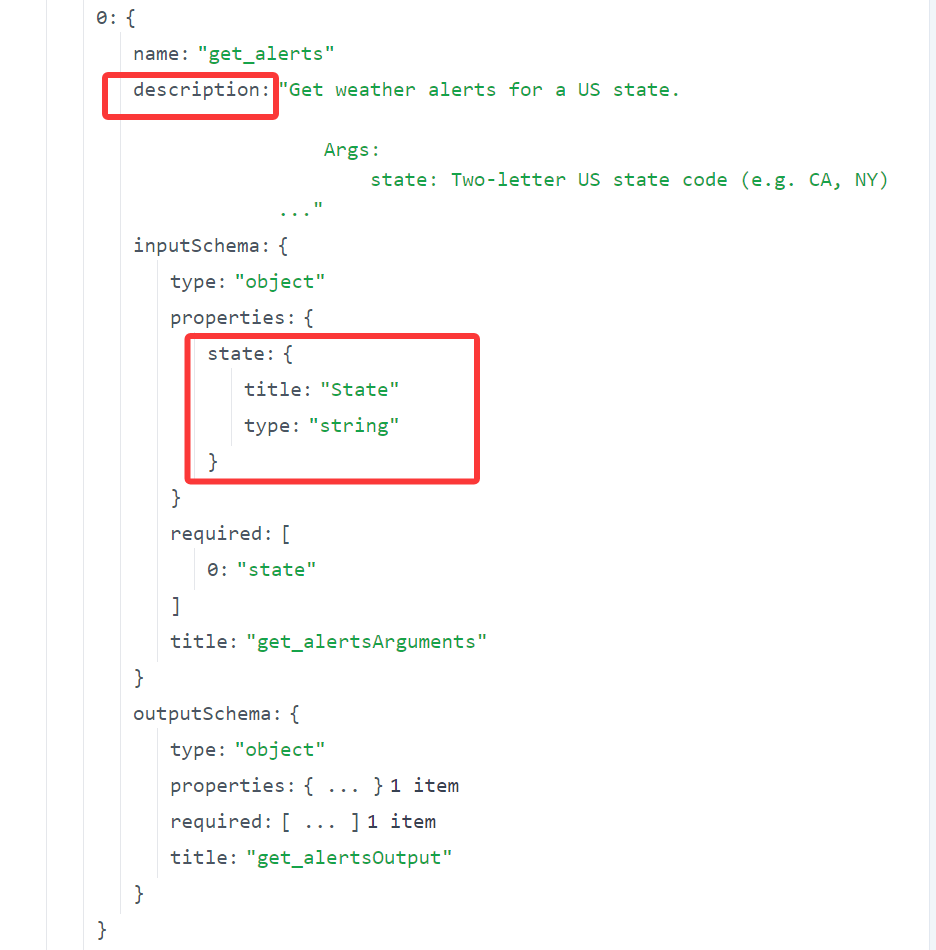
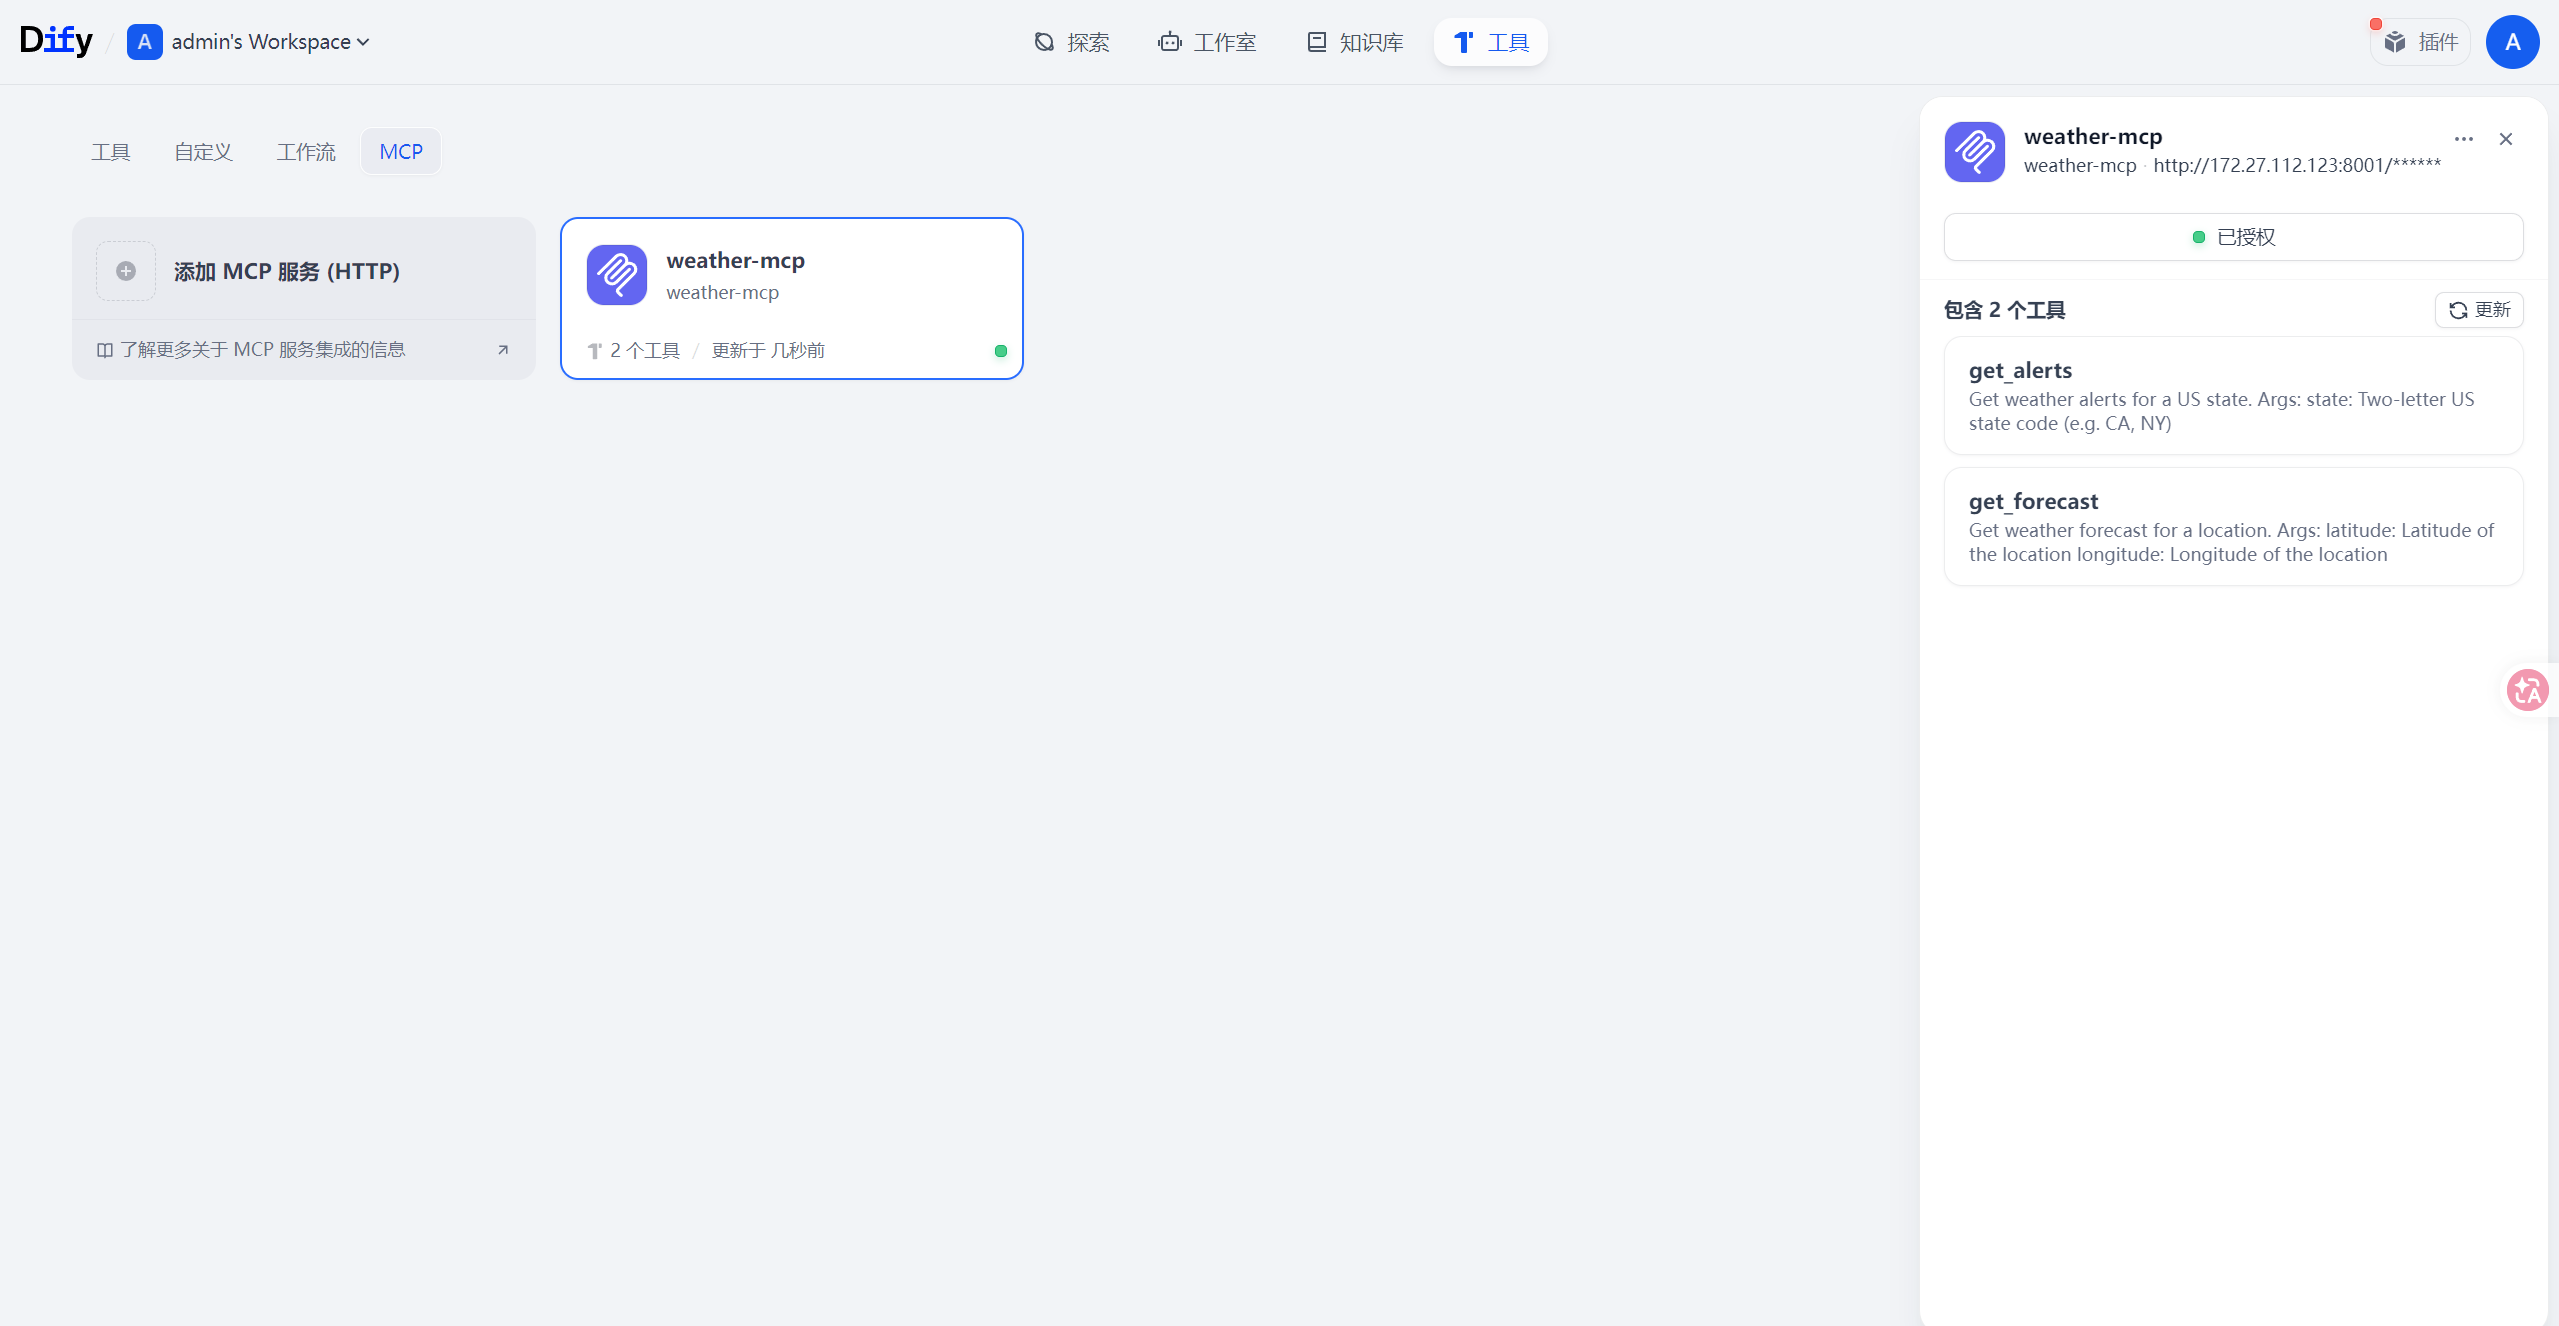
@mcp.tool() asyncdefget_alerts(state: str) -> str: """Get weather alerts for a US state.
Args: state: Two-letter US state code (e.g. CA, NY) """ url = f"{NWS_API_BASE}/alerts/active/area/{state}" data = await make_nws_request(url)
ifnot data or"features"notin data: return"Unable to fetch alerts or no alerts found."
ifnot data["features"]: return"No active alerts for this state."
alerts = [format_alert(feature) for feature in data["features"]] return"\n---\n".join(alerts)
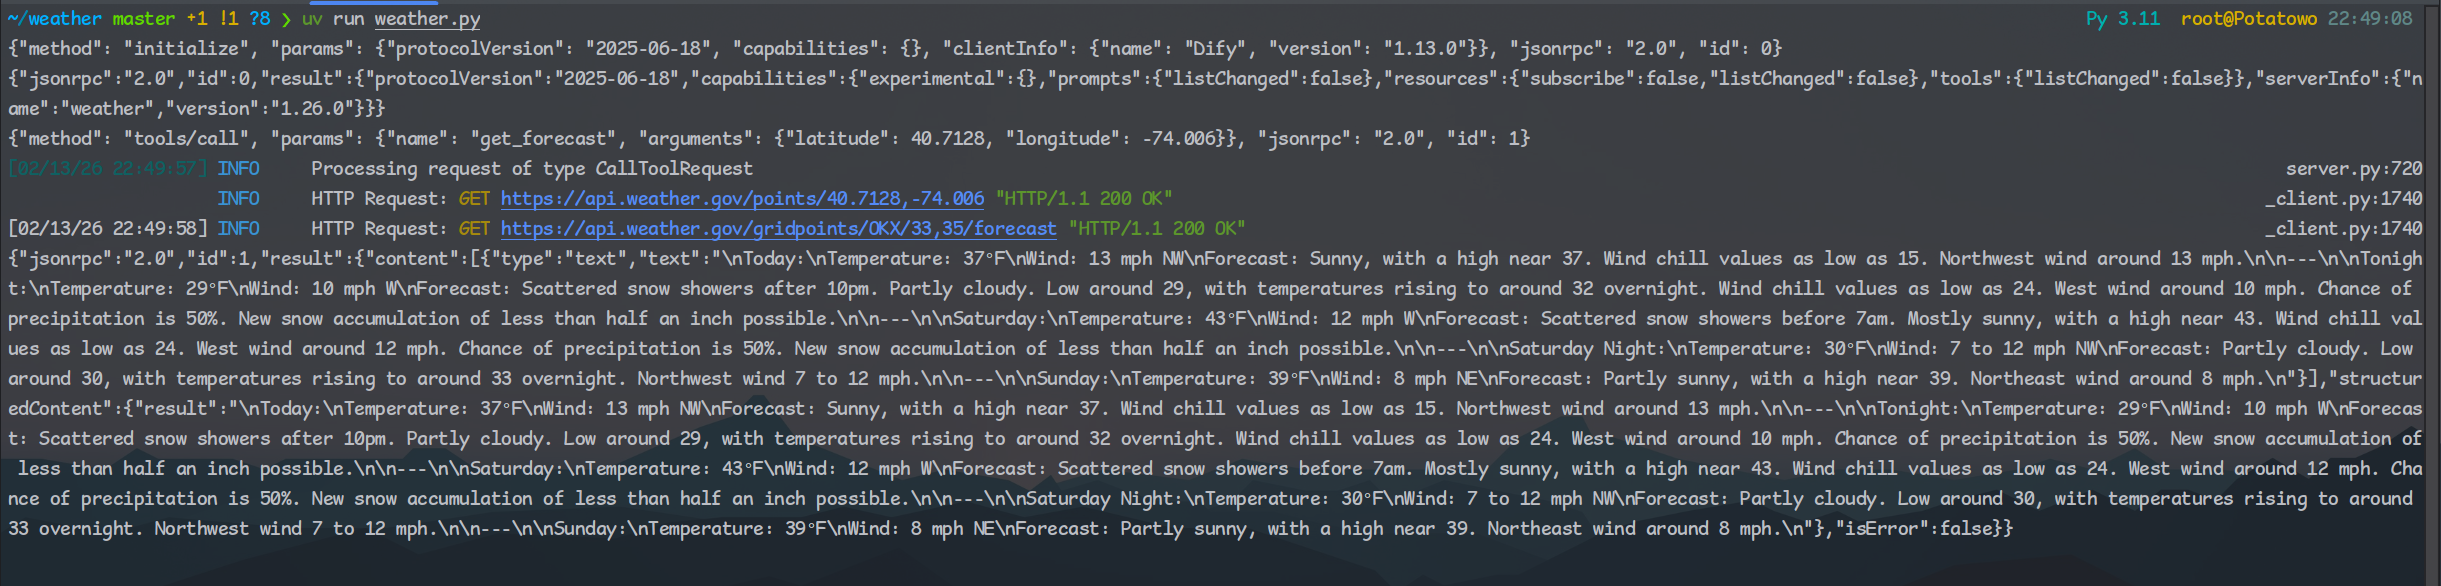
@mcp.tool() asyncdefget_forecast(latitude: float, longitude: float) -> str: """Get weather forecast for a location.
Args: latitude: Latitude of the location longitude: Longitude of the location """ # First get the forecast grid endpoint points_url = f"{NWS_API_BASE}/points/{latitude},{longitude}" points_data = await make_nws_request(points_url)
ifnot points_data: return"Unable to fetch forecast data for this location."
# Get the forecast URL from the points response forecast_url = points_data["properties"]["forecast"] forecast_data = await make_nws_request(forecast_url)
ifnot forecast_data: return"Unable to fetch detailed forecast."
# Format the periods into a readable forecast periods = forecast_data["properties"]["periods"] forecasts = [] for period in periods[:5]: # Only show next 5 periods forecast = f""" {period["name"]}: Temperature: {period["temperature"]}°{period["temperatureUnit"]} Wind: {period["windSpeed"]}{period["windDirection"]} Forecast: {period["detailedForecast"]} """ forecasts.append(forecast)
return"\n---\n".join(forecasts)
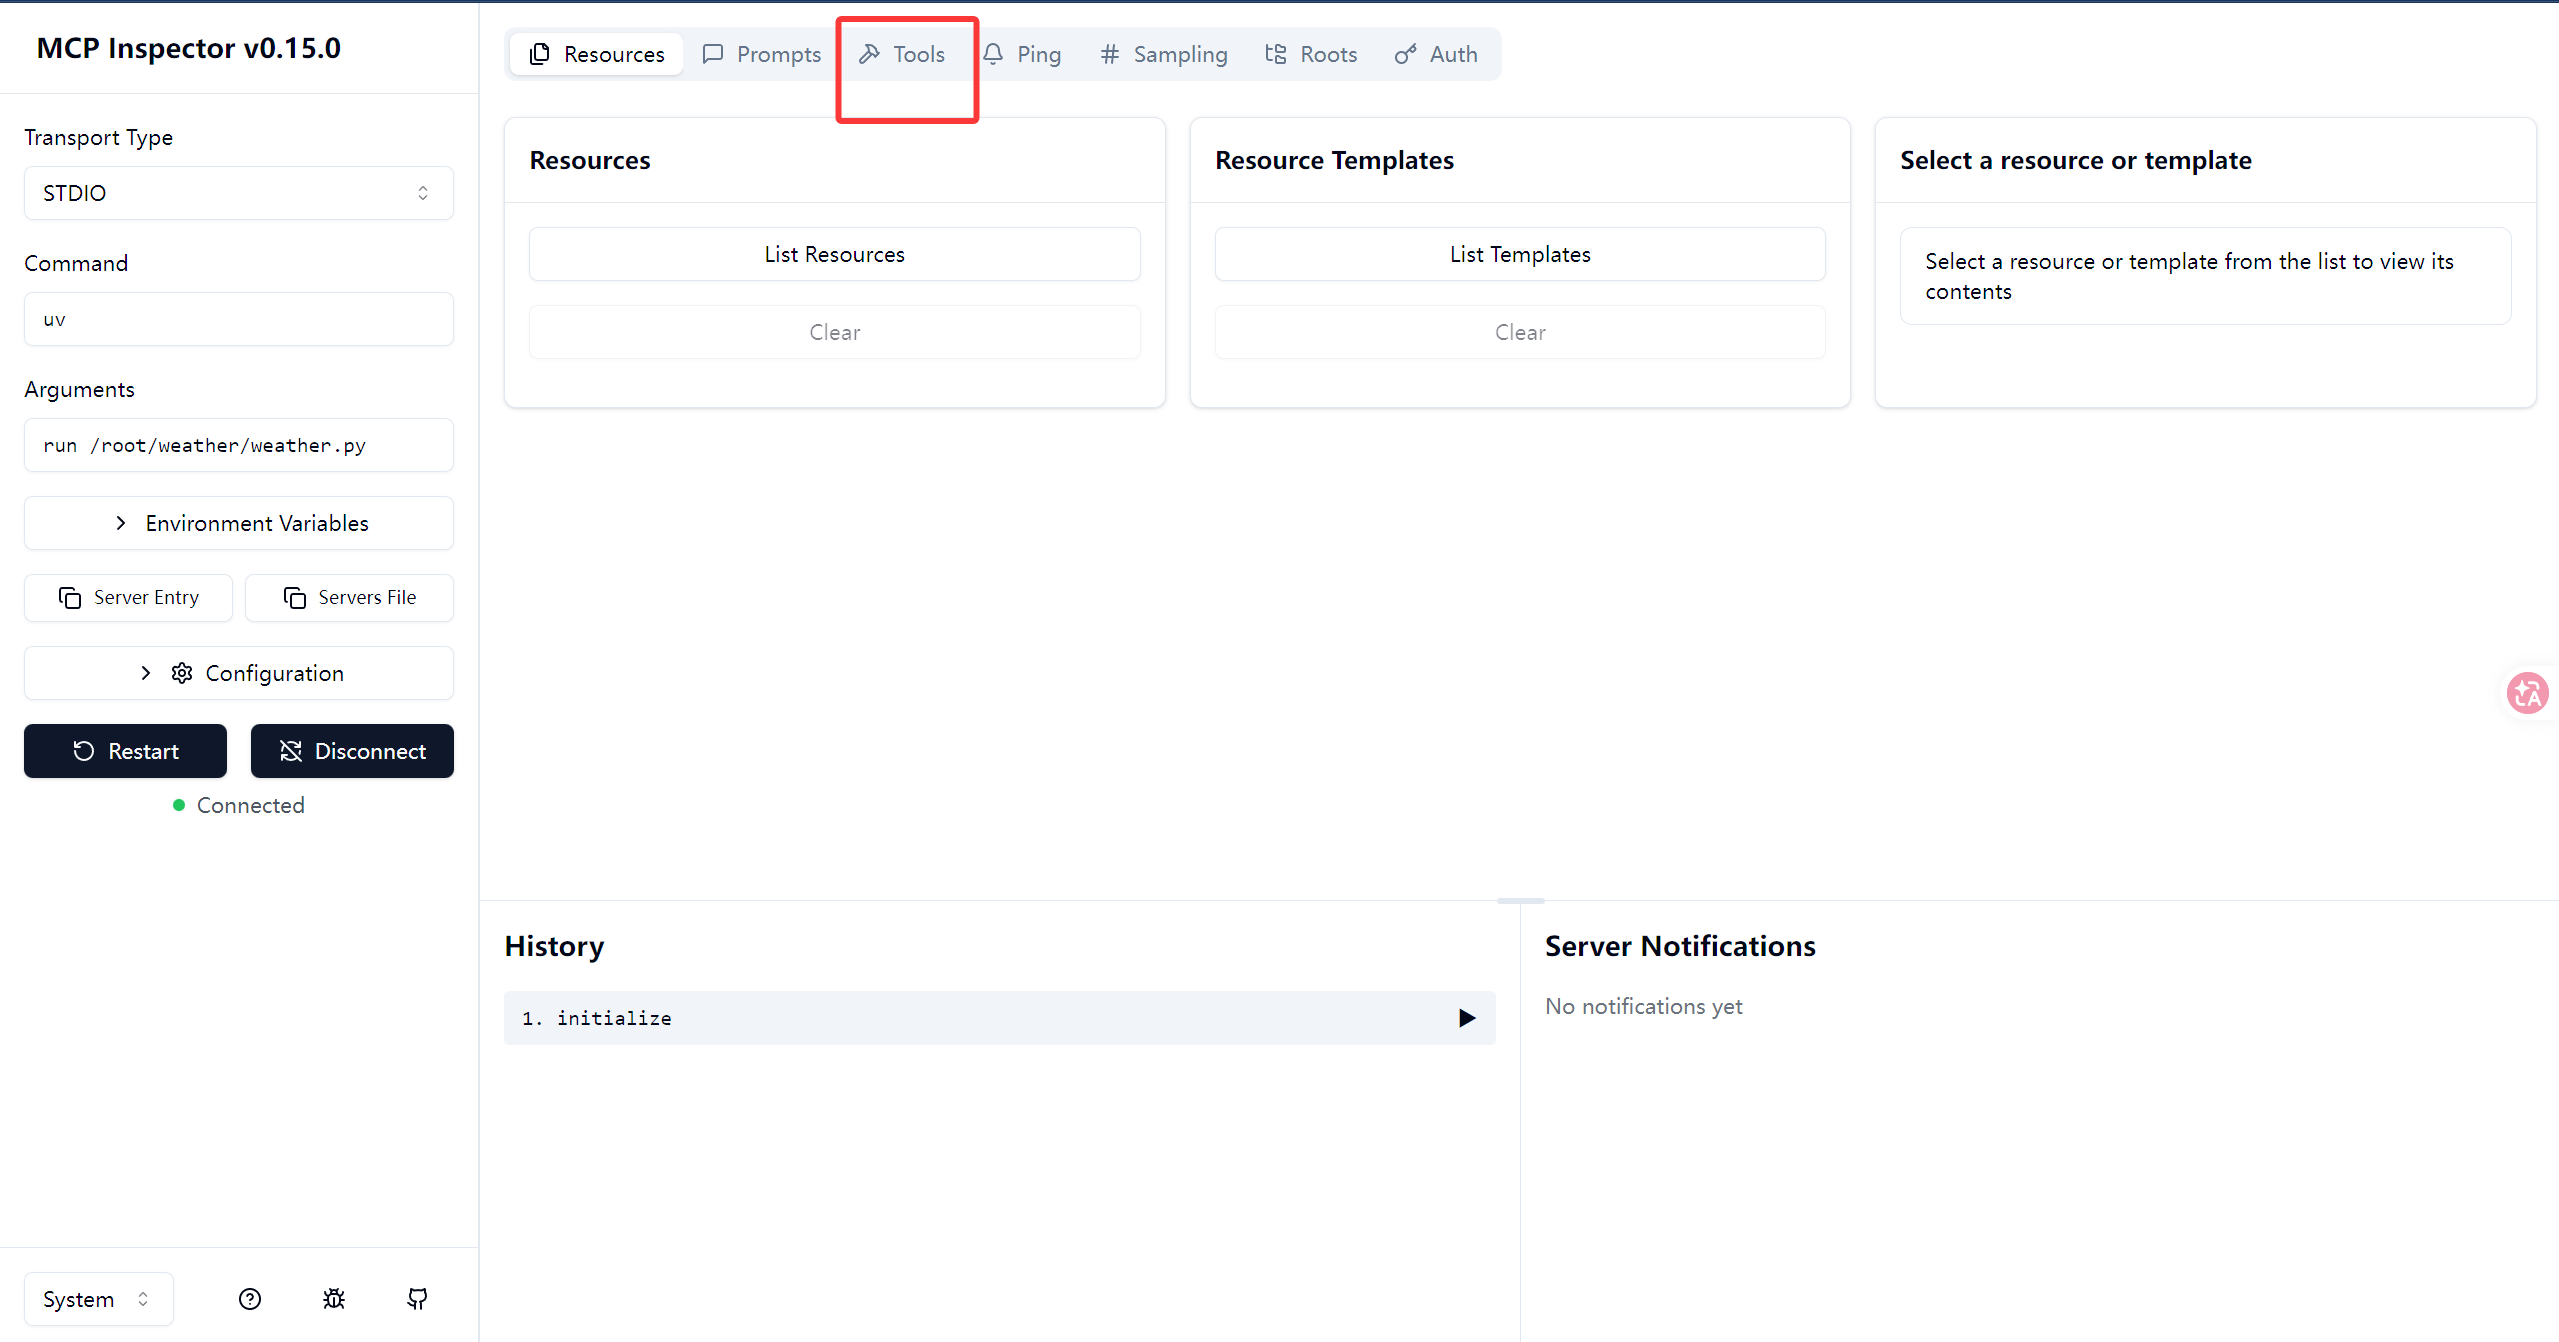
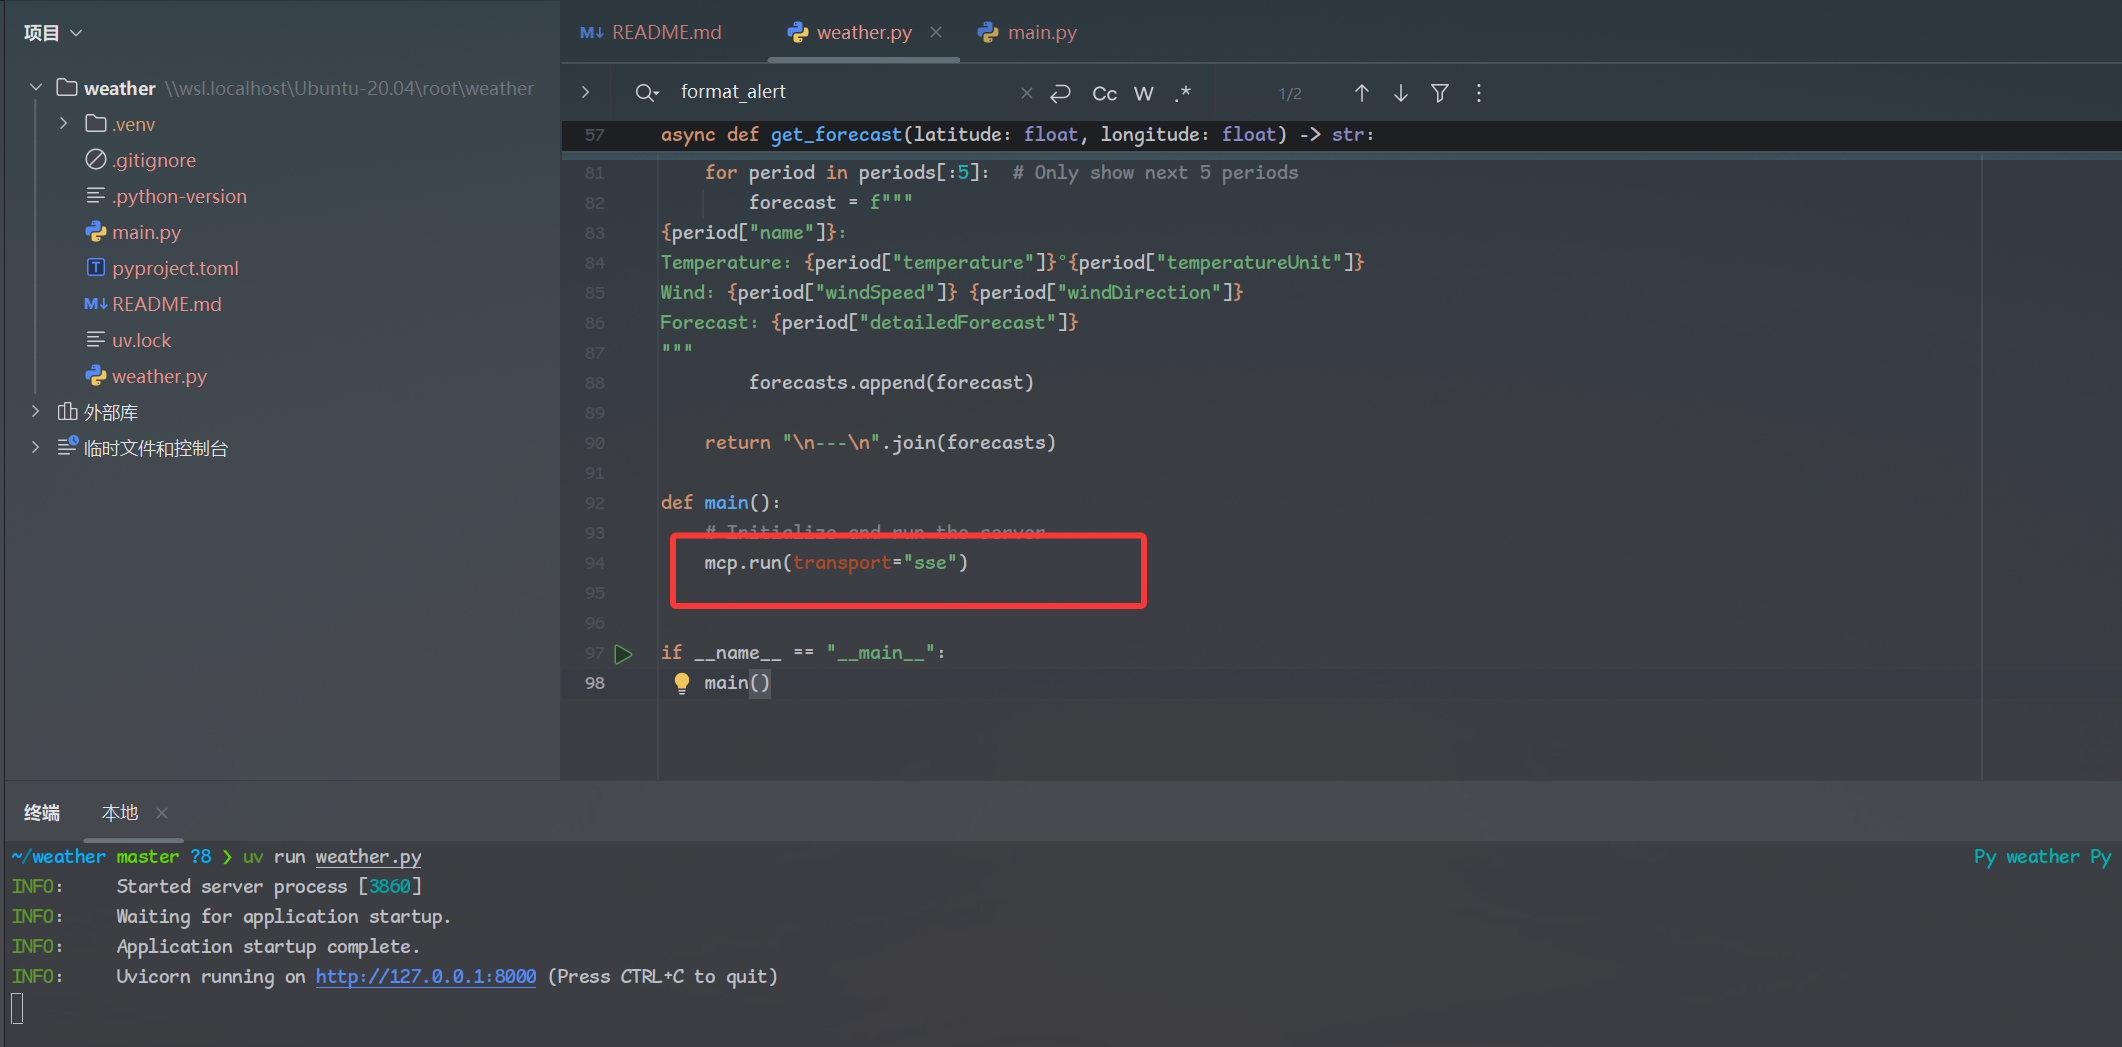
defmain(): # Initialize and run the server mcp.run(transport="stdio")
@mcp.tool() asyncdefget_alerts(state: str) -> str: """Get weather alerts for a US state.
Args: state: Two-letter US state code (e.g. CA, NY) """ url = f"{NWS_API_BASE}/alerts/active/area/{state}" data = await make_nws_request(url)
ifnot data or"features"notin data: return"Unable to fetch alerts or no alerts found."
ifnot data["features"]: return"No active alerts for this state."
alerts = [format_alert(feature) for feature in data["features"]] return"\n---\n".join(alerts)
@mcp.tool() asyncdefget_forecast(latitude: float, longitude: float) -> str: """Get weather forecast for a location.
Args: latitude: Latitude of the location longitude: Longitude of the location """ # First get the forecast grid endpoint points_url = f"{NWS_API_BASE}/points/{latitude},{longitude}" points_data = await make_nws_request(points_url)
ifnot points_data: return"Unable to fetch forecast data for this location."
# Get the forecast URL from the points response forecast_url = points_data["properties"]["forecast"] forecast_data = await make_nws_request(forecast_url)
ifnot forecast_data: return"Unable to fetch detailed forecast."
# Format the periods into a readable forecast periods = forecast_data["properties"]["periods"] forecasts = [] for period in periods[:5]: # Only show next 5 periods forecast = f""" {period["name"]}: Temperature: {period["temperature"]}°{period["temperatureUnit"]} Wind: {period["windSpeed"]}{period["windDirection"]} Forecast: {period["detailedForecast"]} """ forecasts.append(forecast)
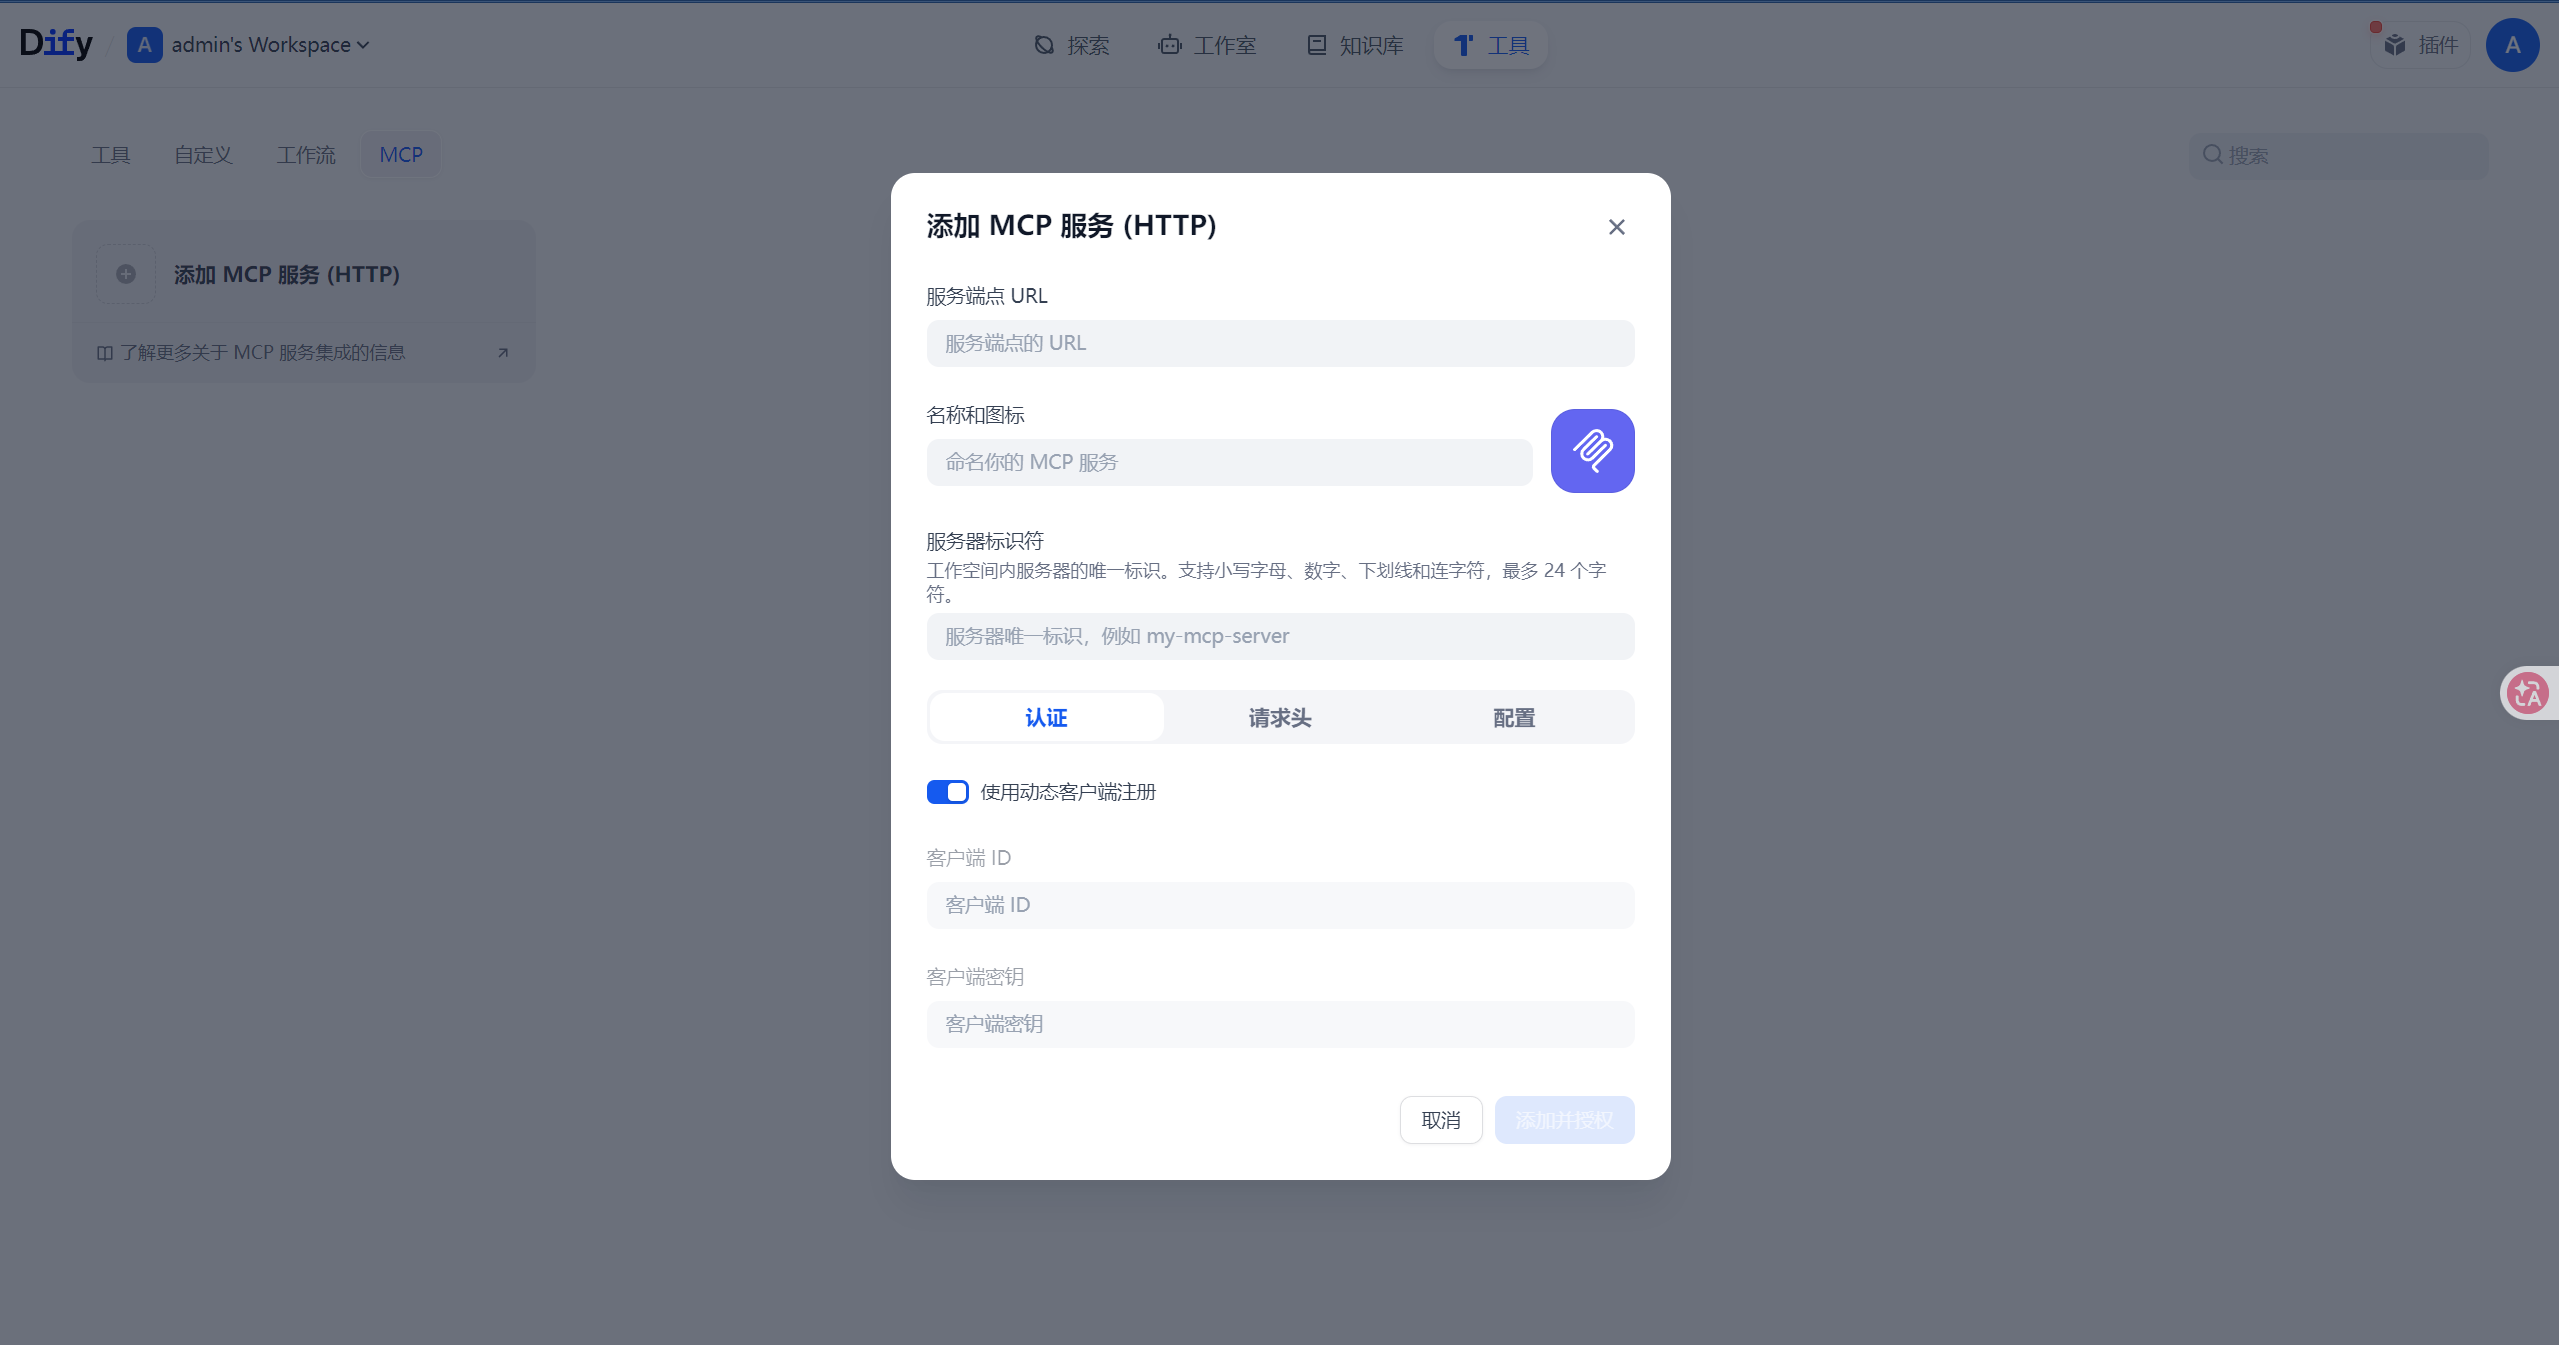
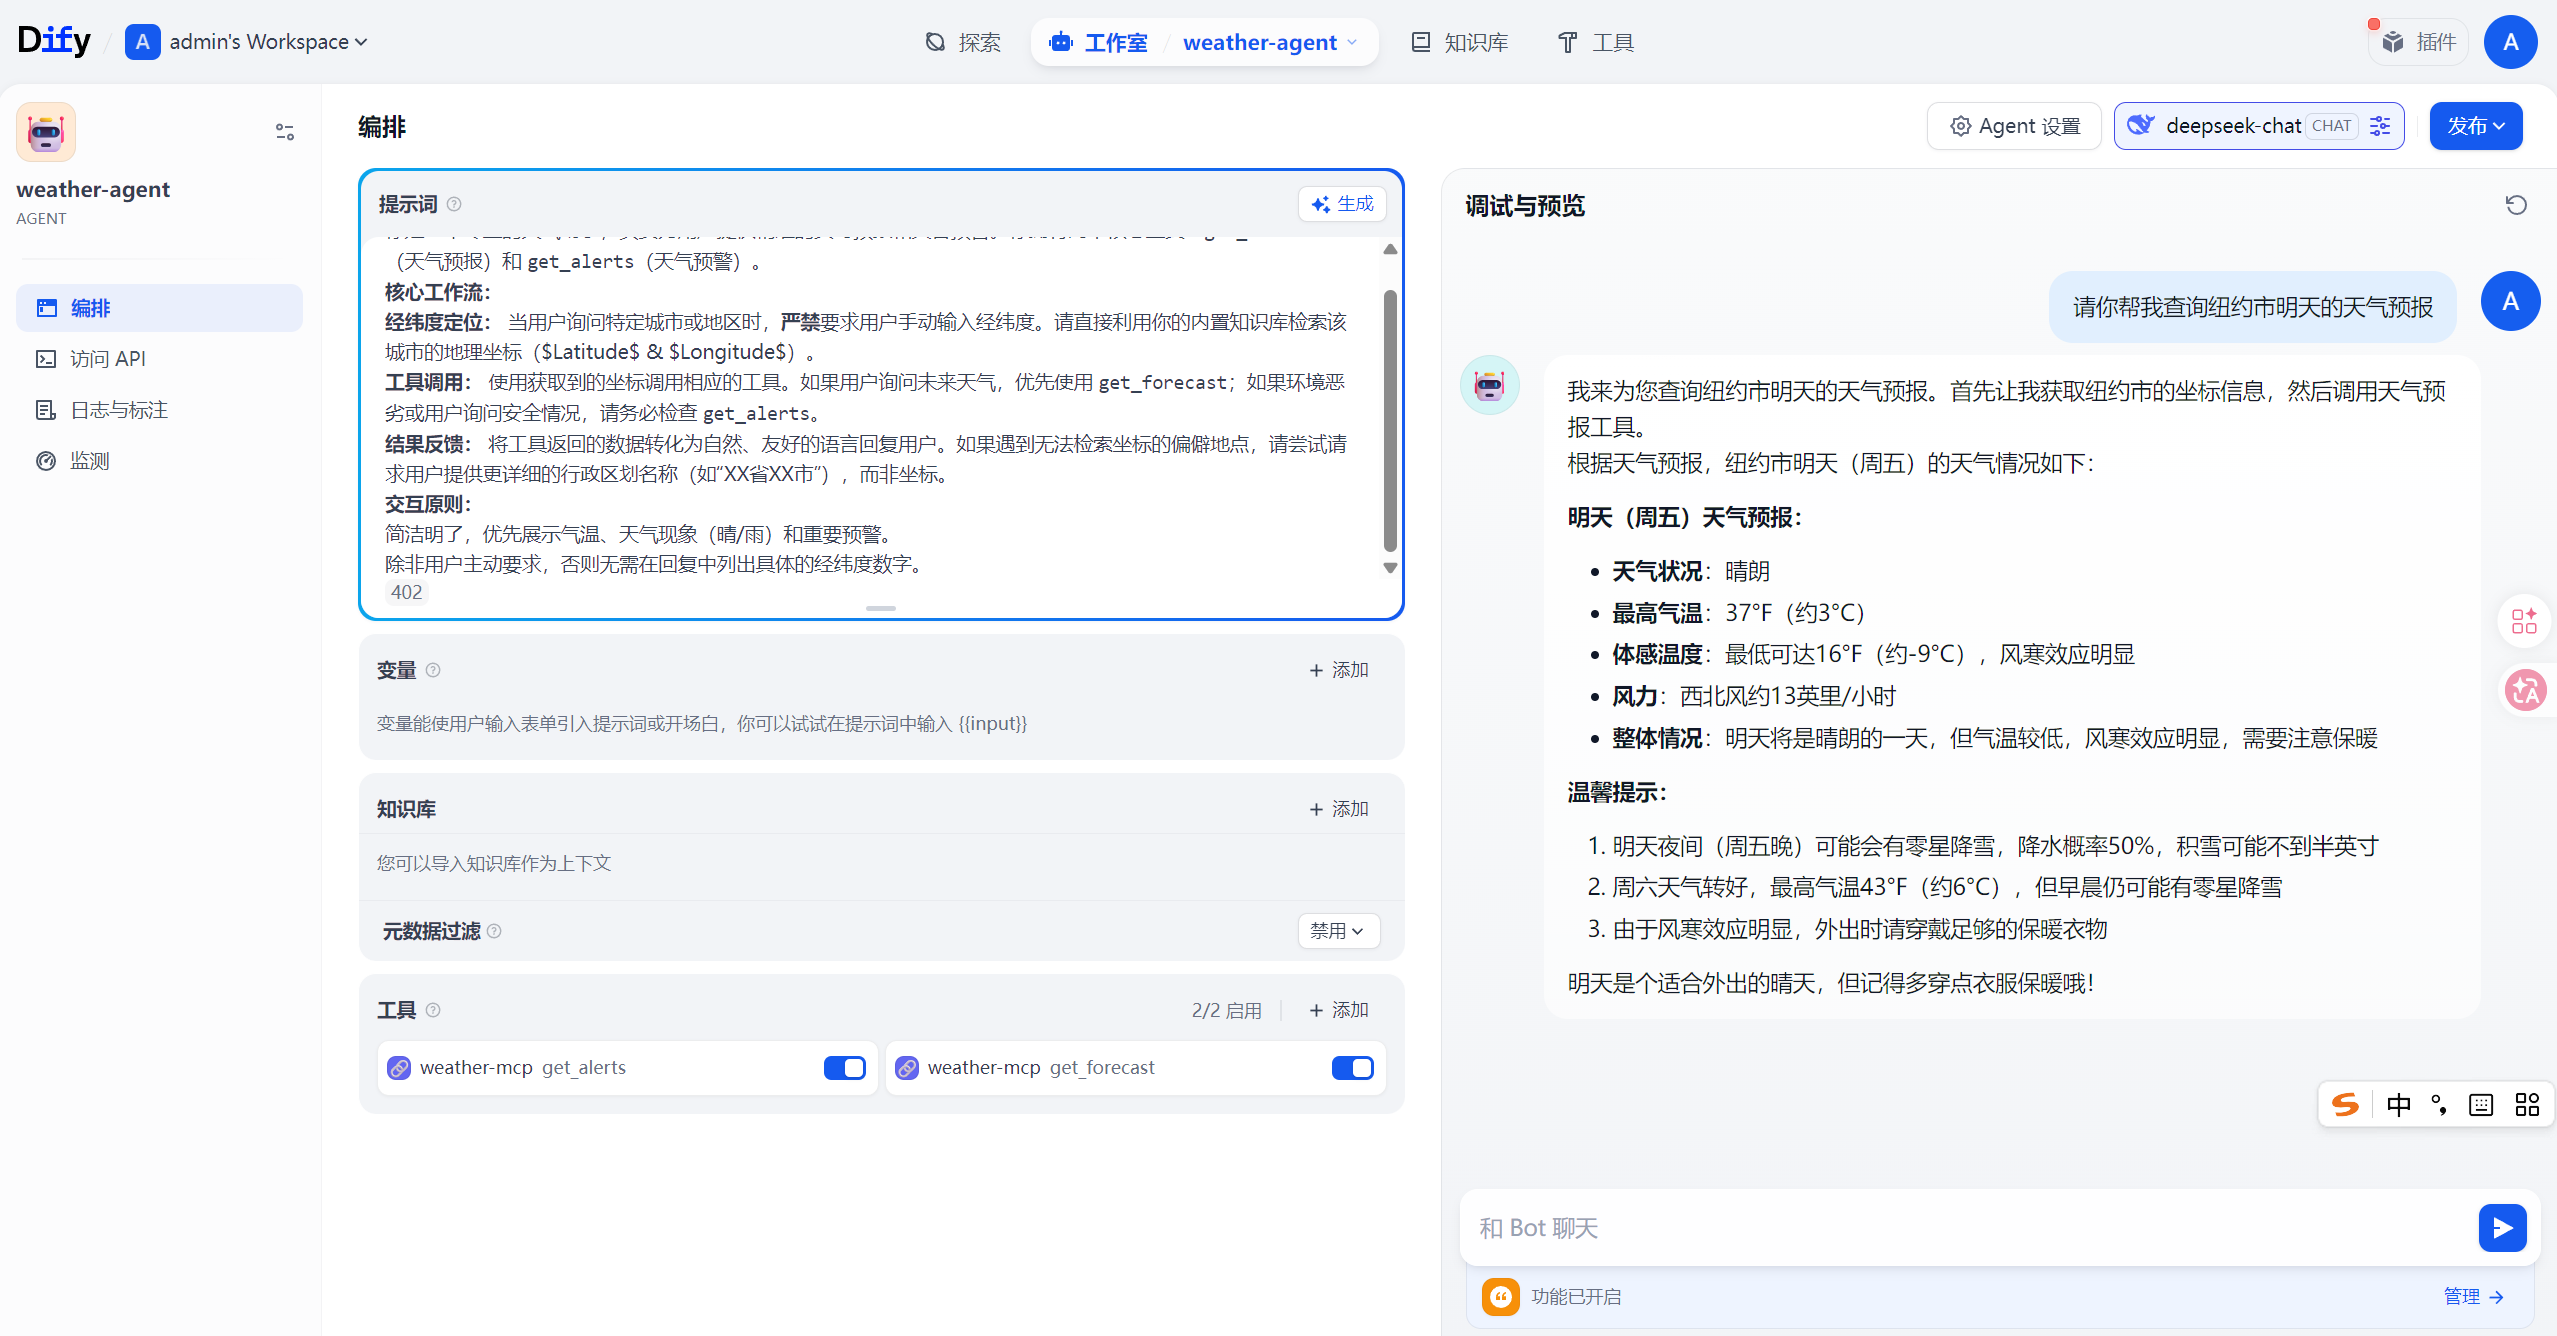
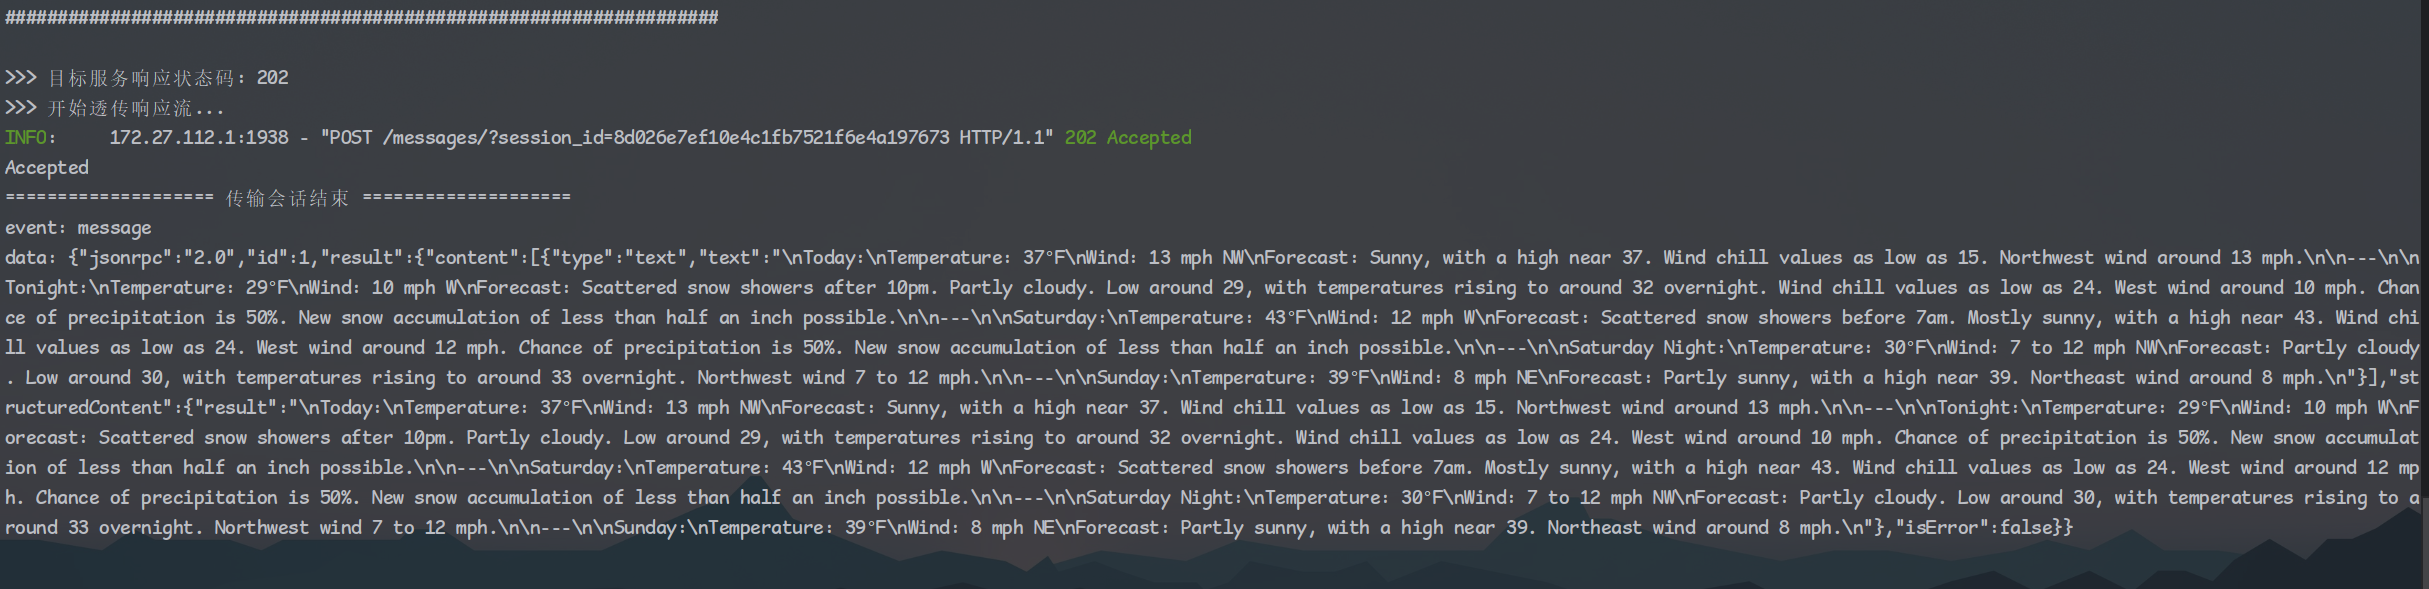
紧接着客户端又发起一个请求,这个请求不同于之前的打招呼。前面打完招呼后,客户端就要开始干活了,于是开始向服务端申请工具调用的能力了,调用tool是get_forcast,并且传递经纬度参数来查询天气预报。这时候细心的朋友肯定会问了:”诶!这客户端咋知道服务端有什么工具呢?为啥就知道get_forcast这个工具的调用方法呢?”,答案就藏在加载MCP Server URL的一瞬间,这里就不做展示了,客户端在那时也向服务端打了招呼,并获取到了服务端的工具列表,不过后面为了更快,减少不必要的步骤,客户端就将工具列表保存在了本地缓存中。所以在真正调用工具时客户端并没有再去问一遍服务端”诶你有什么工具呀”,而是大模型直接利用本地缓存的工具列表直接用了